
Installation · Chapter 4
First boot and network connection
With the card ready, you can now start the Raspberry Pi and find its address on the network.
Connect the device
Insert the microSD card into the Raspberry Pi. Connect the network cable to the eth0 port. Connect the power supply — the device turns on and boots by itself. Watch the result on the monitor connected to the HDMI output.
If you will distribute the signal by multicast to a local network, also connect the USB-Ethernet adapter to the eth1 port. Preferably, perform the Gateway installation with the USB-to-network adapter plugged into a blue USB port on the Raspberry Pi.
The device gets an IP address
During the first boot (one or two minutes), the Raspberry requests an IP address from your network. You will need that address to access the Raspberry Pi over SSH and install the Gateway.
Note the IP address
There are two ways to find it:
- With a monitor: connect a screen over HDMI. When the boot finishes, the screen shows the line «My IP address is …».
- From your router or with an IP scanner: open your router's administration page and look for the device by its name. You can also use an IP scanner to find the IP that was assigned to the device.
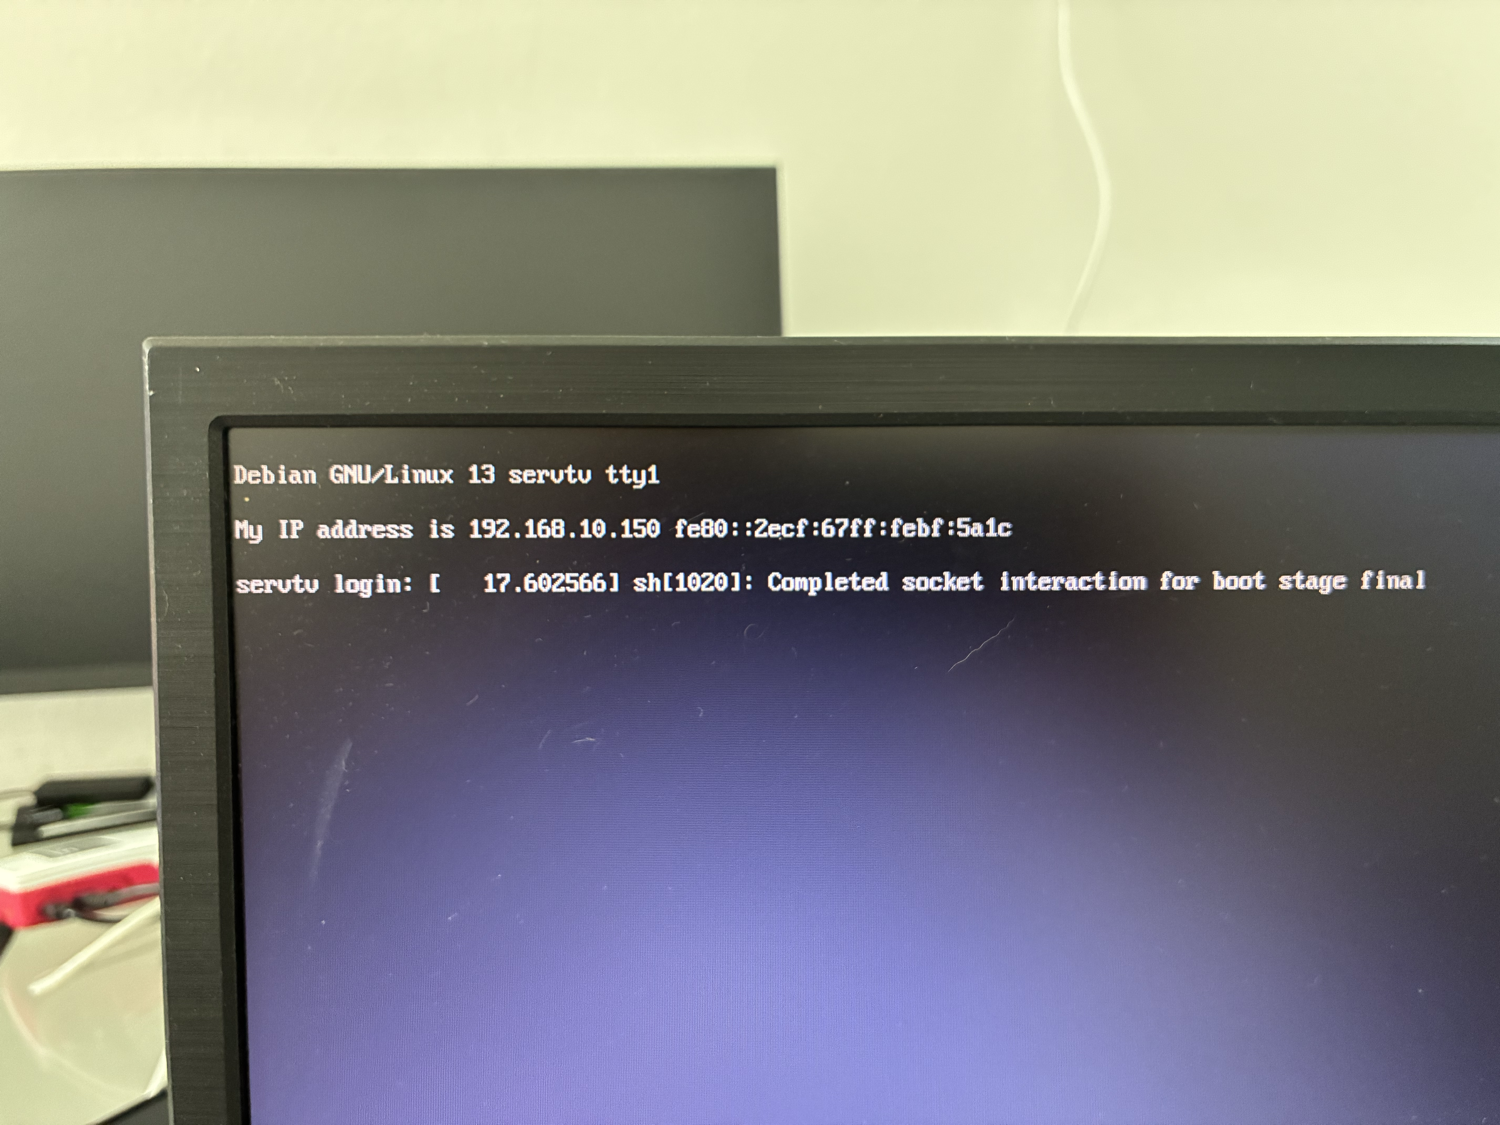
The Gateway needs internet to install and is configured to boot with DHCP. If DHCP is not available to assign an IP, you will need to configure a valid IP to connect to the internet. In that case, follow chapter 5 before continuing.
In this case, the video monitor shows the IP address assigned by DHCP. Write it down — you will use it to access the system over SSH from your computer and install the Gateway (chapter 6).